

5 Handy Registry Hacks to optimize Windows 10
Productivity is key, and a big part of that is optimizing our operating system to the max. In Windows 10 there are many useful settings but is not accessible through the Control Panel or Settings.
This is where the Registry Editor comes in handy as it allows you to enable certain features that can give you more information about Windows 10 and enhance your experience.
Before you edit or start making changes to the registry we strongly advise that you create a back up. and making changes. The Registry Editor is quite a powerful little tool.
By backing up the registry first, you will be able to recover and restore the system should you accidentally edit or delete some registry entries.
So let’s jump right in. The following registry hacks will most definitely enhance and improve your Windows 10 experience.
1. Bing Search – Disabling
Bing Search is integrated with Windows Search. This is for when your local search does not find any content you searched, Bing will then try to find the required content.
You are able to disable in the Registry and this is how you go about it.
- In your Windows Search box type in Registry editor and open.
- Press the YES button to continue when Windows asks your permission to continue.
- Go to the HKEY_CURRENT_USER\Software\Microsoft\Windows\CurrentVersion\Search key int the Registry Editor
- On the Search Folder, Right click and go to New > DWORD (32-bit) Value

- To create the new value type “BingSearchEnabled”
- Type 0 on BingSearchEnabled box and click OK
- Next go to CoranaConsent, type in 0 in the box and click OK
- Close the Editor and restart
After making the above change Windows will only display a blank page when there are no local results.
2. Windows 10 Lock Screen – Disabling
When you don’t have a touchscreen, Windows 10’s lock screen feature is unnecessary. There are a lot of settings available that allows you to modify the lock screen, but by editing the Registry you are able to remove it completely.
And this is how:
- In Windows Search type”Registry Editor” and Open
- Press YES to continue when permission is asked to continue with the Editor
- Double-click HKEY_LOCAL_MACHINE in the registry
- Go to \SOFTWARE\Policies\Microsoft\Windows
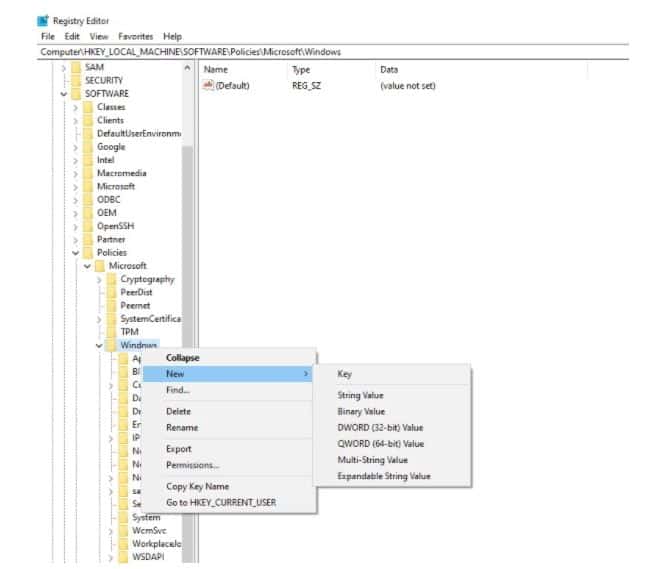
- Create a key called “Personalization” under the Windows folder.
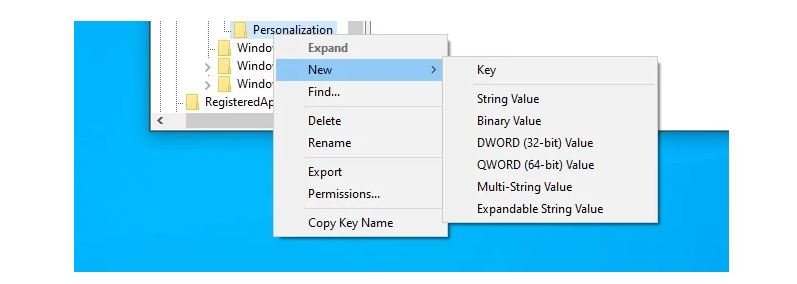
- On the Personalisation key you just created right-click and select New – DWORD (32-bit) Value
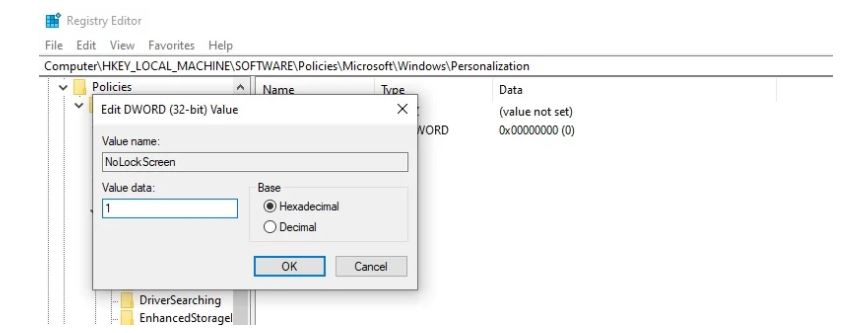
- In the Value name box type in NoLockScreen
- In the Value data box type 1
Once you have created this key you have successfully disabled the lock screen.
3. Add an Open Command Prompt Window to your File Explorer Context Menu
Open a Command Prompt Window automatically by restoring the context menu option via your Registry.
Follow these next few steps to add ‘Open command window here’
- In your Windows search, type, Registry Editor and click to open
- Click YES to continue when permission is asked to open the editor
- Go to HKEY_CLASSES_ROOT\Directory\Background\shell\cmd
- On the cmd (folder) key right-click and go to Permissions and then to Advanced
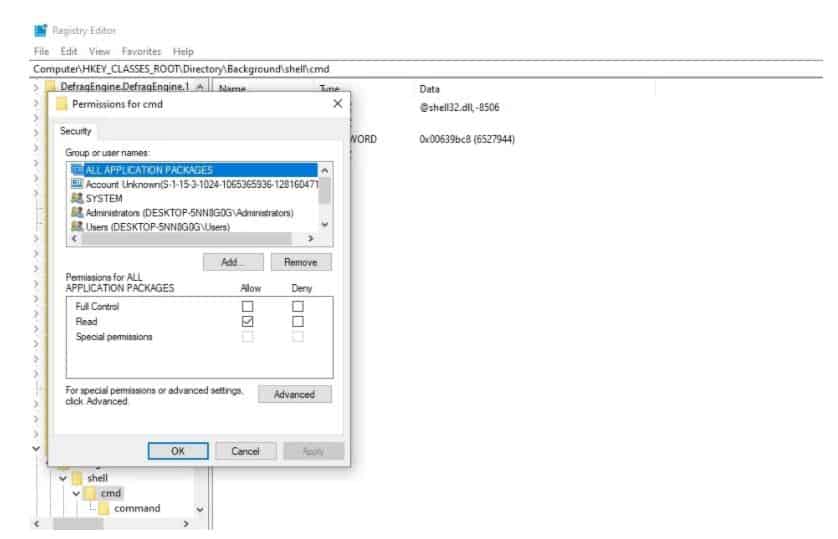
- Click on Change next to TrusedInstaller
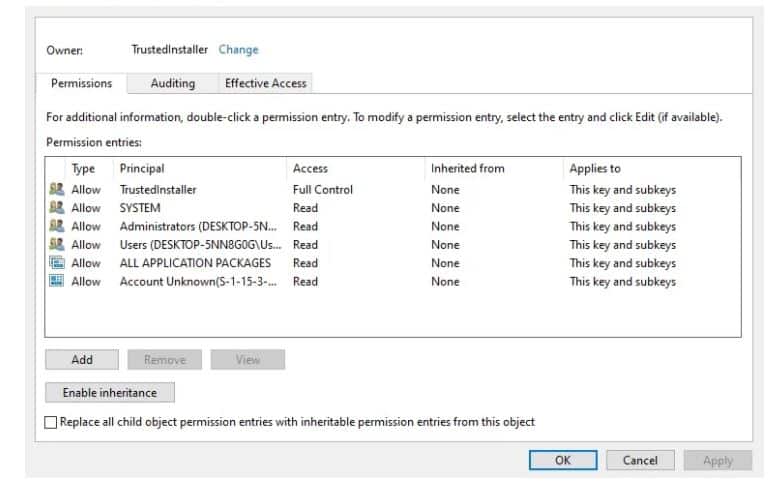
- Enter your account name
- To verify your account name click on “Check Names” and then “OK”
- Check “Replace owner on subcontainers and objects”
- Click Apply and then OK
- Go to “Permissions” and select Administrators group
- Enable Allow for Full Control
- Click Apply and OK
- Go back to the Registry Folder ‘cmd’ and right-click the HideBasedOnVelocityId DWORD and click Rename
- Change the DWORD from HideBasedOnVelocityId to ShowBasedOnVelocityId
- Click Enter and Restart Explorer.exe
Once you have restarted your Explorer, hold in Shift and right-click on a folder. The context menu Open command window will now be visible
4. Have seconds displayed on your Taskbar clock
Windows 10 only shows hour and minutes by default and doesn’t have a built-in option to show the seconds.
But by modifying your registry you can enable the seconds on your Windows 10 Taskbar clock. And this is how we are going to do it.
- Go to Windows Search, type Registry Editor and click Open
- When permission is asked to launch the editor click YES
- Go to HKEY_CURRENT_USER\Software\Microsoft\Windows\CurrentVersion\Explorer\Advanced
- Right-click on the Advanced Folder and choose New > DWORD (32-bit) Value
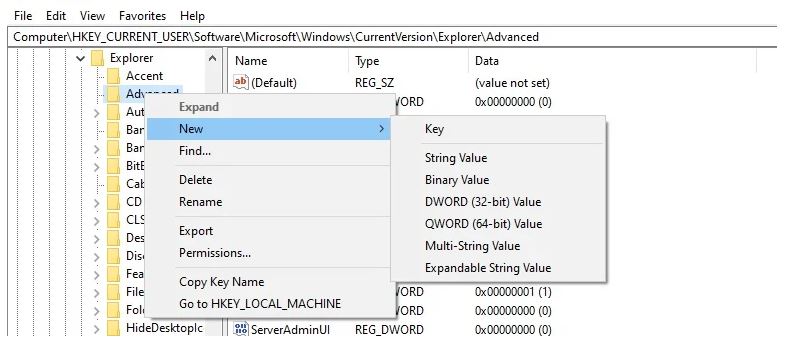
- Name the key “ShowSecondsInSystemClock”
- Change the Value to 1 and click OK
- Close the registry editor and restart Windows
5. Enable Verbose in Windows 10
Booting your Windows 10 into “Verbose mode” allows you access to more detailed information when you need to troubleshoot problems.
When booting in “Verbose mode” you will be able to see the specific step the operating system is on when booting up or shutting down.
With this you are able to troubleshoot shutdown and startup issues to see specific steps being performed and when problems occur.
This should only be enabled if you have technical knowledge to troubleshoot critical Windows problems.
You would need to follow the following steps to enable “Verbose” mode
- Go to Windows Search box and type in Registry Editor – Open
- When asking permission to open the editor click on YES
- Go to HKEY_LOCAL_MACHINE\SOFTWARE\Microsoft\Windows\CurrentVersion\Policies\System
- Right-click the System folder, select NEW – DWORD (32-bit) Value.
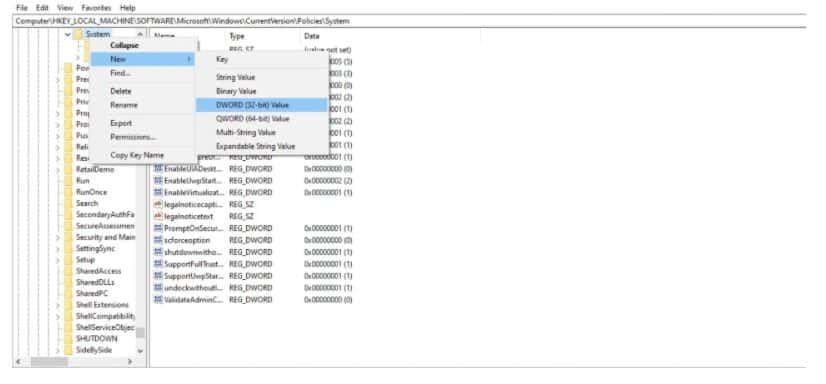
- Name it “VerboseStatus”
- Change the value to 1 and click OK
- Close the Registry Editor and Reboot
Once this setting is enabled both your boot-up & shutdown process will display every step along the way.
With the above handy hacks you will be able to optimize your Windows 10 experience and in turn be more productive.


Say, you got a nice article post. Thanks Again. Cool. Sibbie Butch Selry